When one door closes ... you build a headboard.
Local musician Ben Lewis got the idea for turning a door into a headboard after he saw something similar in a bar at one of his shows.
"It was a mantle made out of an old door, and I thought it was so unique," Lewis said. "It's always been in the back of my mind as something I wanted to do."
So when Lewis spotted an old door as he was driving through town one day, he knew immediately he wanted to build something with it. Lewis said the door was in pretty bad shape when he found it, but it just kick-started his creative urge to reincarnate the forgotten lumber.
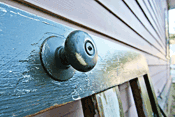
"I chose the side with the door knob to use as the top of the headboard which runs horizontally," he said. "I didn't want to hide the doorknob or remove it. I thought it added a lot of character."
Lewis' first step was to measure the width of the bed and center the doorknob. Lewis used the side with the hinges for the bottom of the headboard, which also runs horizontally.
"There was an empty space where a glass pane had been, so that made it a little more difficult," Lewis said. "A door with some unique details or paneling is a great find. I'm a college student and a musician, so those are two indicators of the money I have to spend on a hobby. There are some great doors available at antique stores but they can be expensive."
To fill the space, Lewis used a 2-by-6 with hinges on it and cut it into four pieces with a circular saw to run vertically between the two pieces of the door."
"Some people screw the door directly into the wall, but I live in an apartment and would rather be sure I'll be getting my security deposit back when I move out," he said. "I also knew I wanted to do a footboard, too, so I didn't want to use that technique."
He chose 4-by-4 posts for the sides and screwed the whole thing together with timber screws. He then used the scrap pieces of lumber to build the footboard in virtually the same way.
"Once it was done, I used some cheap 2-by-4s and 1-by-6s for the side rails. To support the mattress I cut slats using two 1-by-8s," Lewis explained.
Lewis wanted to make sure the door still had an antique feel after the refinishing part of the project. "I sanded the entire thing with an orbital sander, wiped it down with a wet rag, and applied two coats of satin varnish to finish it," he said. "The store only had shiny silver screws, so to keep the look consistent I painted and sanded those down, too.
"It's an interesting focal point in my room, and I couldn't be happier with it. It's an inexpensive way to do something unique and I'm glad I took the time to do it."
What You Need
For a step-by-step guide, e-mail Ben Lewis at {encode="[email protected]" title="[email protected]"}.
Estimated cost: $120 (he already had the power tools)
Estimated time: 13 hours of labor (including letting paint dry)
Tools used for this project:
1. circular saw
2. cordless drill with a nut driver
3. orbital sander
4. tape measure and pencil
5. hammer
6. small square
7. level


Comments
Use the comment form below to begin a discussion about this content.
comments powered by Disqus