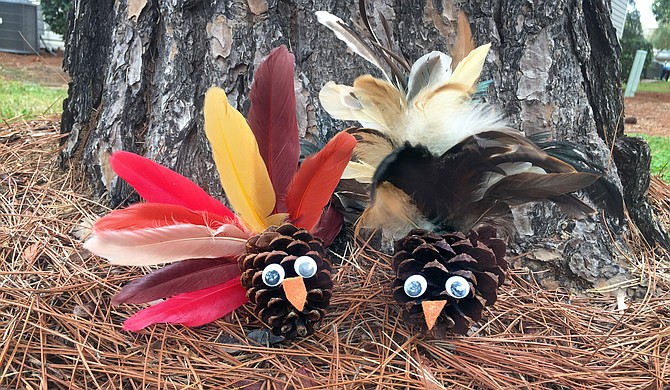
One benefit of living in the Pine Belt is that we have an abundance of pine trees in Mississippi that grace us with dozens of pinecones as we enter the autumn season. Instead of simply collecting and bagging the pinecones, though, try using some of these fallen blessings to have a little family fun through crafting. Being creative together can leave lasting memories, and materials for this particular Thanksgiving-themed DIY are fairly cheap to procure from your favorite local arts and crafting store.
Materials
• Pinecones (collected or purchased)
• Artificial feathers, multicolored (either bags of loose feathers or pre-constructed plumes)
• Googly eyes
• Felt (orange, or another fall color)
• Scissors
• Hot glue and a hot-glue gun
Directions
- Lay your chosen pinecone on a flat surface and turn it until it is stable and balanced. Once you find the most secure position, note that the part touching the ground will serve as your turkey's "belly."
- Thus, on the opposite end of the pinecone (the part that should be facing upward), use the hot-glue gun to paste on two googly eyes. Be careful so that when the glue dries, the eyes are both at the same angle so that your crafted critter will appear to be looking straight.
- Using the scissors, cut out a portion of felt that you can shape into a beak. The nose could be triangular or more rounded, whatever you or your child's creativity decides. Use the hot-glue gun to paste the nose onto the edge of the pinecone, below and between the eyes.
- With the loose feathers, arrange them in a fanning shape until you have the plume you desire. I love alternating between fall colors, but feel free to follow your own path here. Use the hot-glue gun to cement the feathers together where their bases are touching. Be careful not to jostle the feathers too much—you don't want them to change directions and ruin the fan.
- Once the glue connecting the feathers into a plume dries, take the plume and hot-glue it to the back of the pinecone, which should be flat enough to accommodate the plume.
- Alternatively, if you bought a pre-constructed plume, use the scissors to cut off any extra wire (some plumes come with a wire "stem") so that hot-gluing the plume to the back of the pinecone is easier.
- Once the glue is dry and your pinecone gobblers are complete, give them names and find a nice spot in the house or yard for them to nest.


Comments
Use the comment form below to begin a discussion about this content.
comments powered by Disqus